Setting up Athena Sync
Here we'll talk about how you can get the API access needed for Mere Medical to connect to your Athena Health patient portal.
To get started, you'll need to create an Athena Health developer account. You can do this by creating an account here.
Once you've created an account, you'll need to create an app registration for your self-hosted Mere instance. The goal of an app registration is to get a Client ID that can be used by your instance of Mere Medical to connect to Athena Health.
Create a New App
After you've logged in to the Athena developer portal, click the Create a New App button to get started with a new app registration.

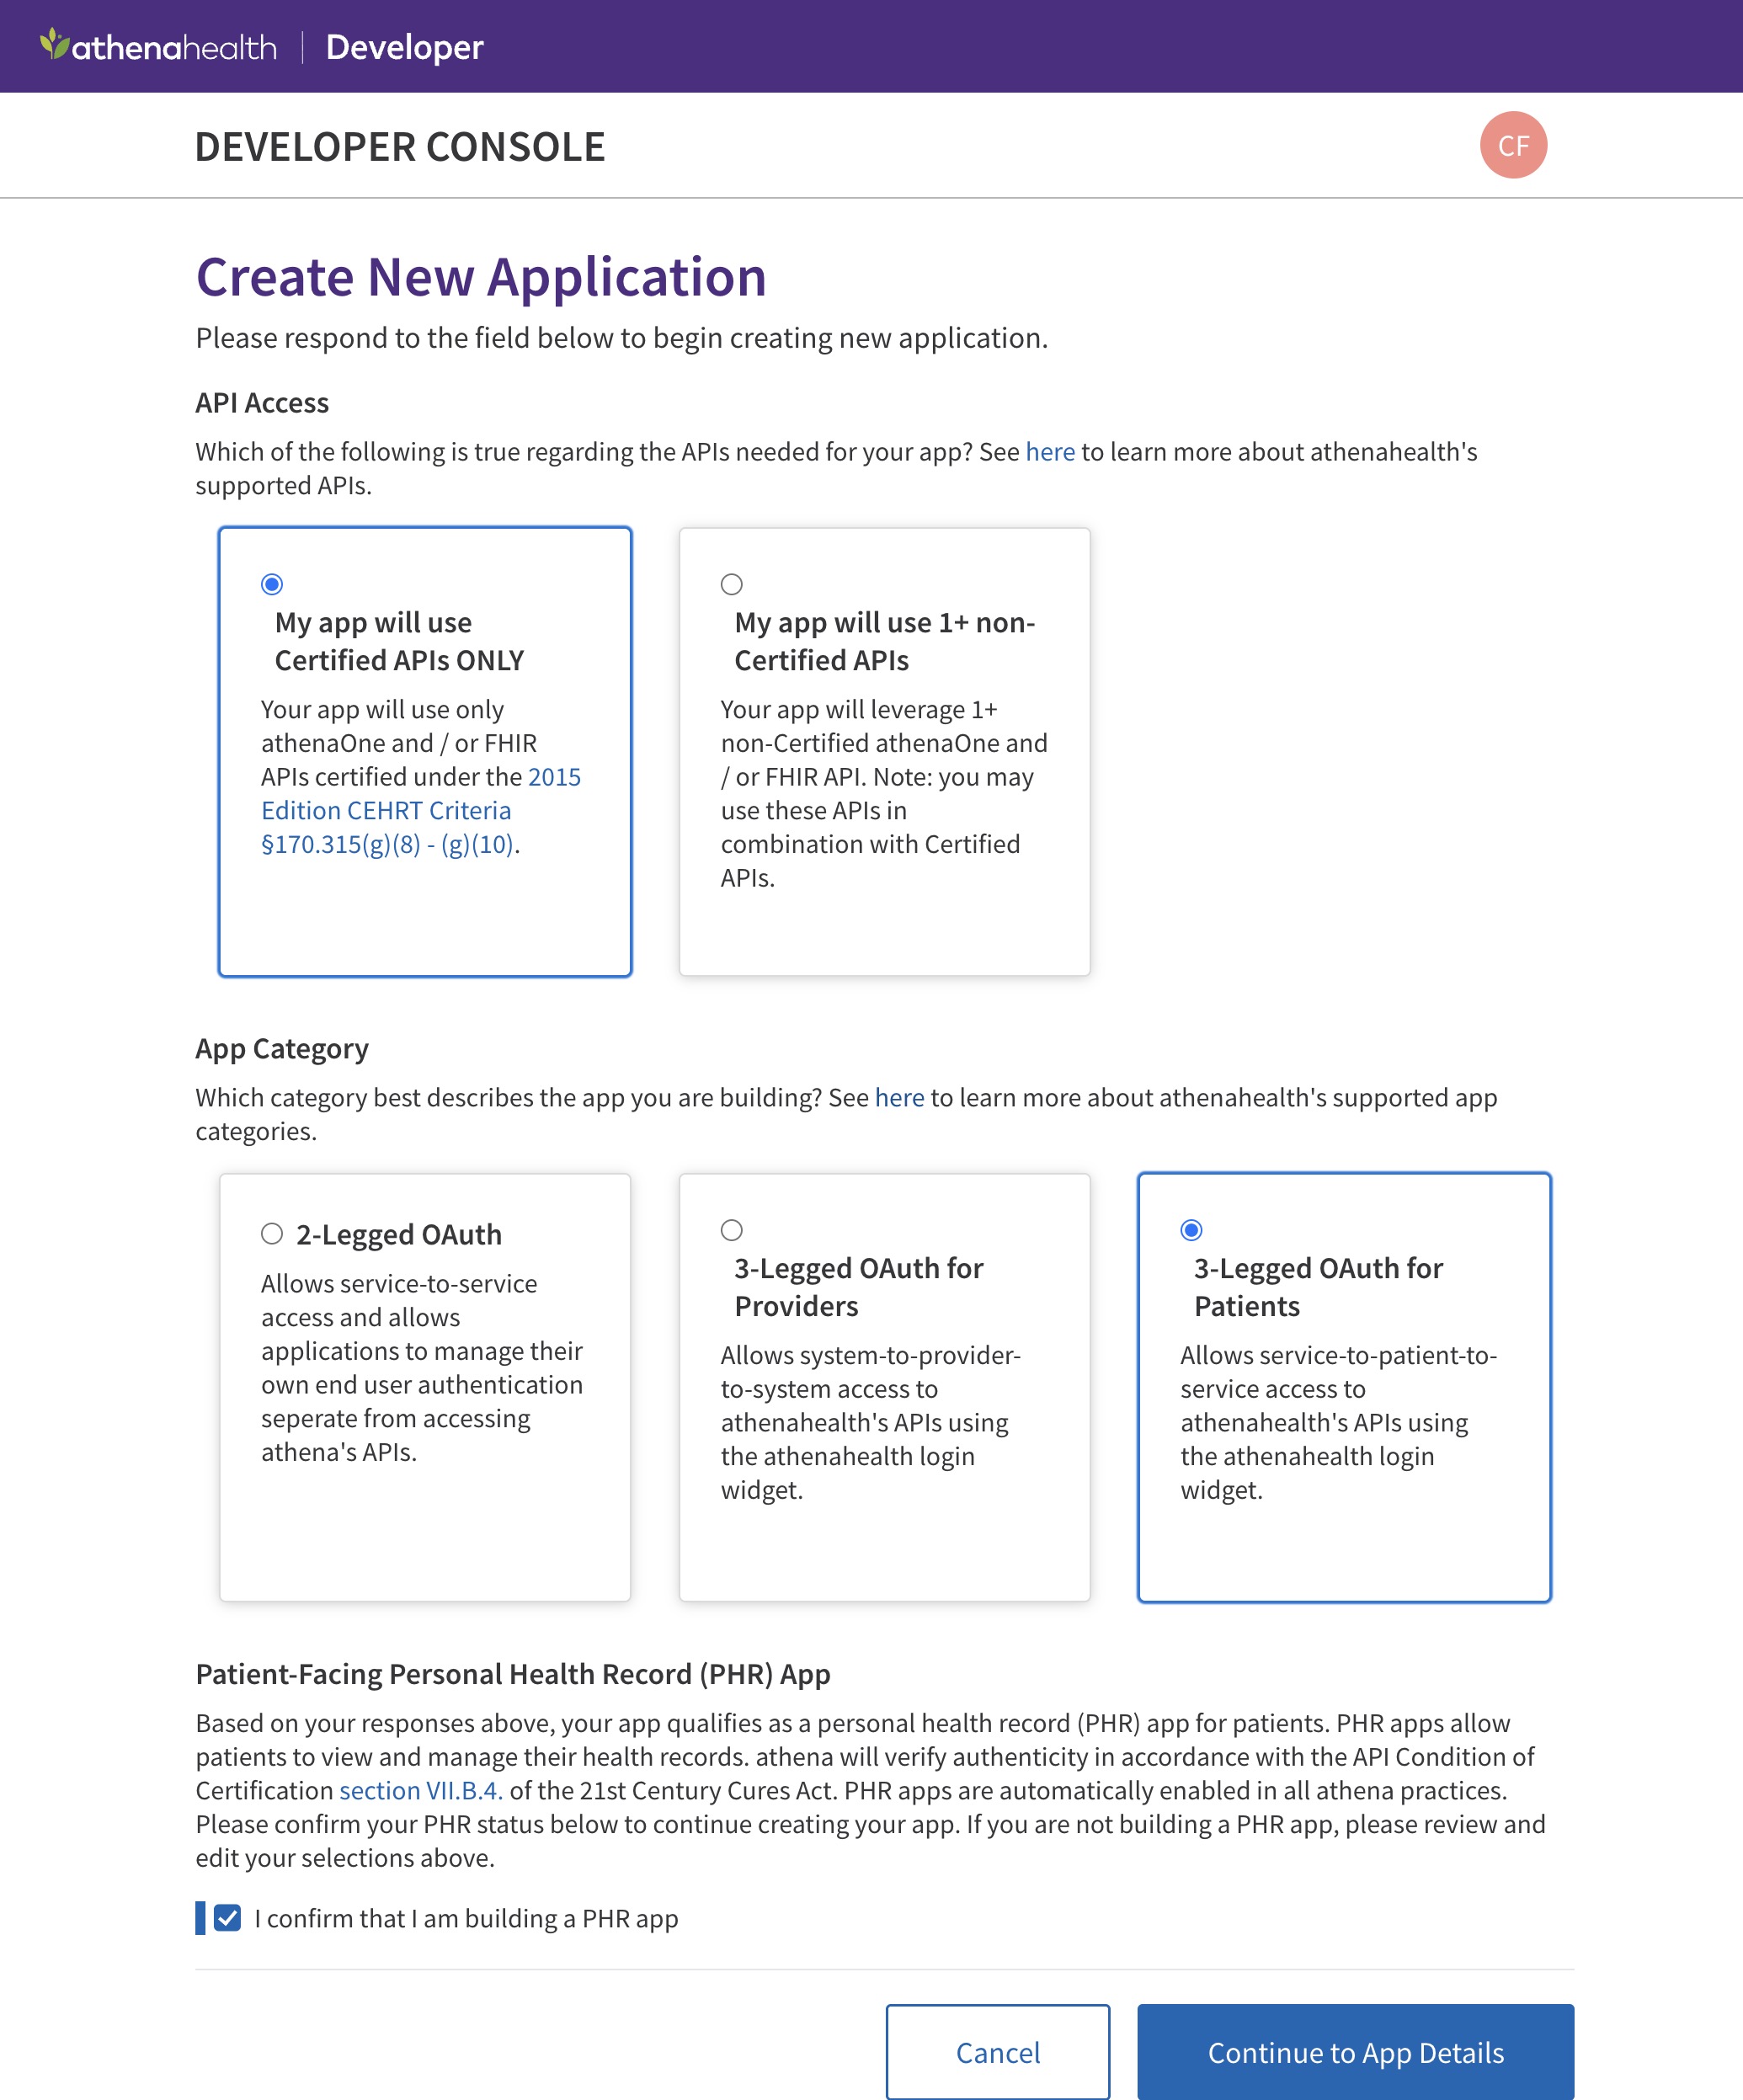
Select API Access and App Category
Configure your API access and authentication settings:
- API Access: Select "My app will use Certified APIs ONLY"
- App Category: Select "3-Legged OAuth for Patients"
- Check "I confirm that I am building a PHR app"
- Click Continue to App Details
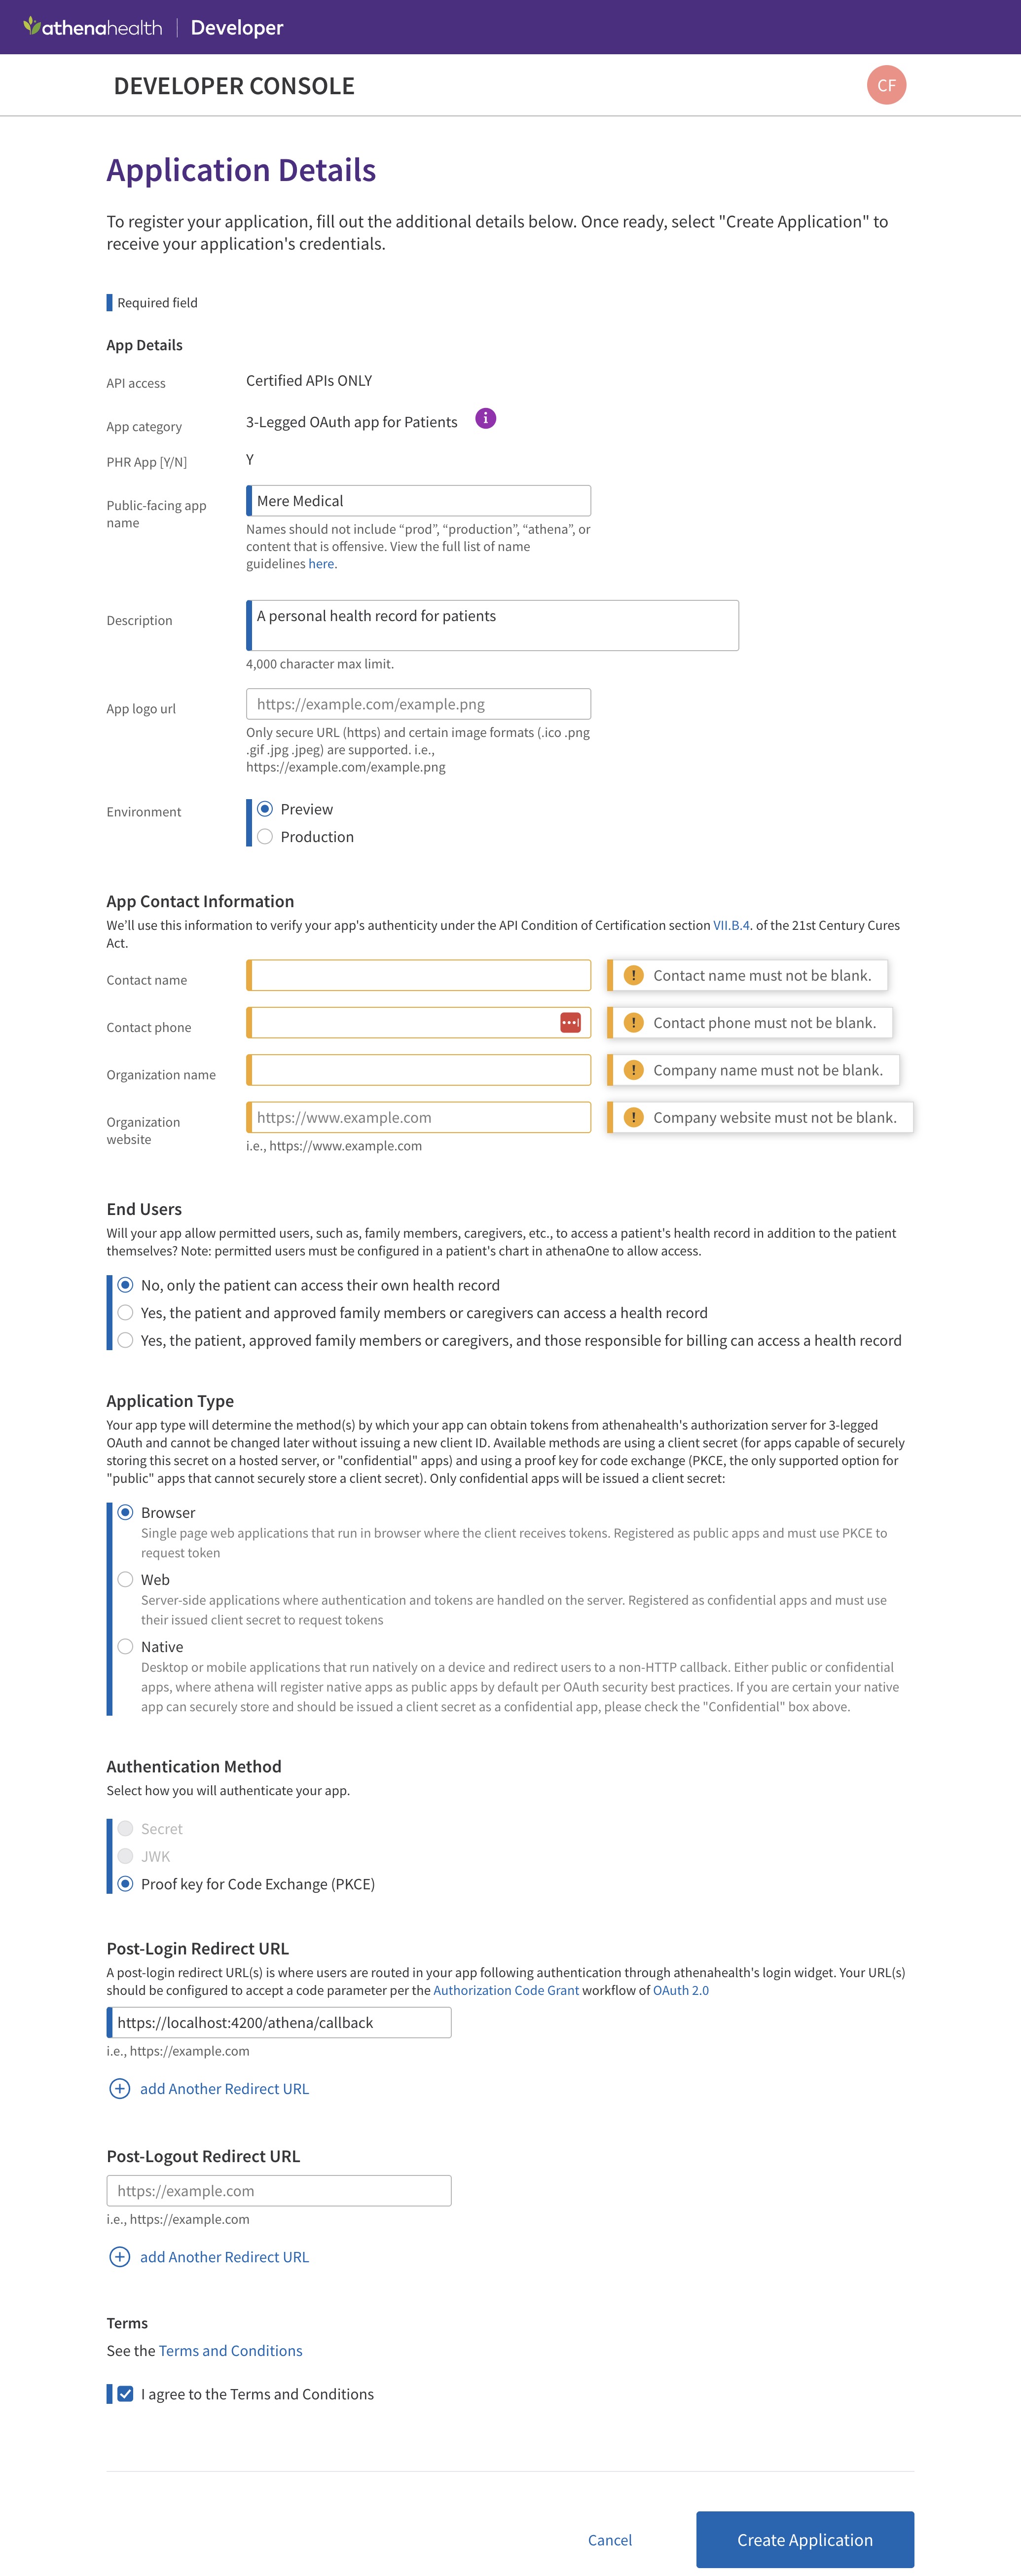
App Registration Details
Fill in the app registration form:
- App Name: Mere Medical
- Description: A personal health record app for managing your medical data
- Environment: Preview (for testing)
- End Users: "No, only the patient can access their own health record"
- Application Type: Browser
- Authentication Method: Proof Key for Code Exchange (PKCE)
- Post-Login Redirect URL:
https://localhost:4200/athena/callback(or{PUBLIC_URL}/athena/callbackfor your hosted instance) - Agree to the Terms and Conditions
- Click Create Application
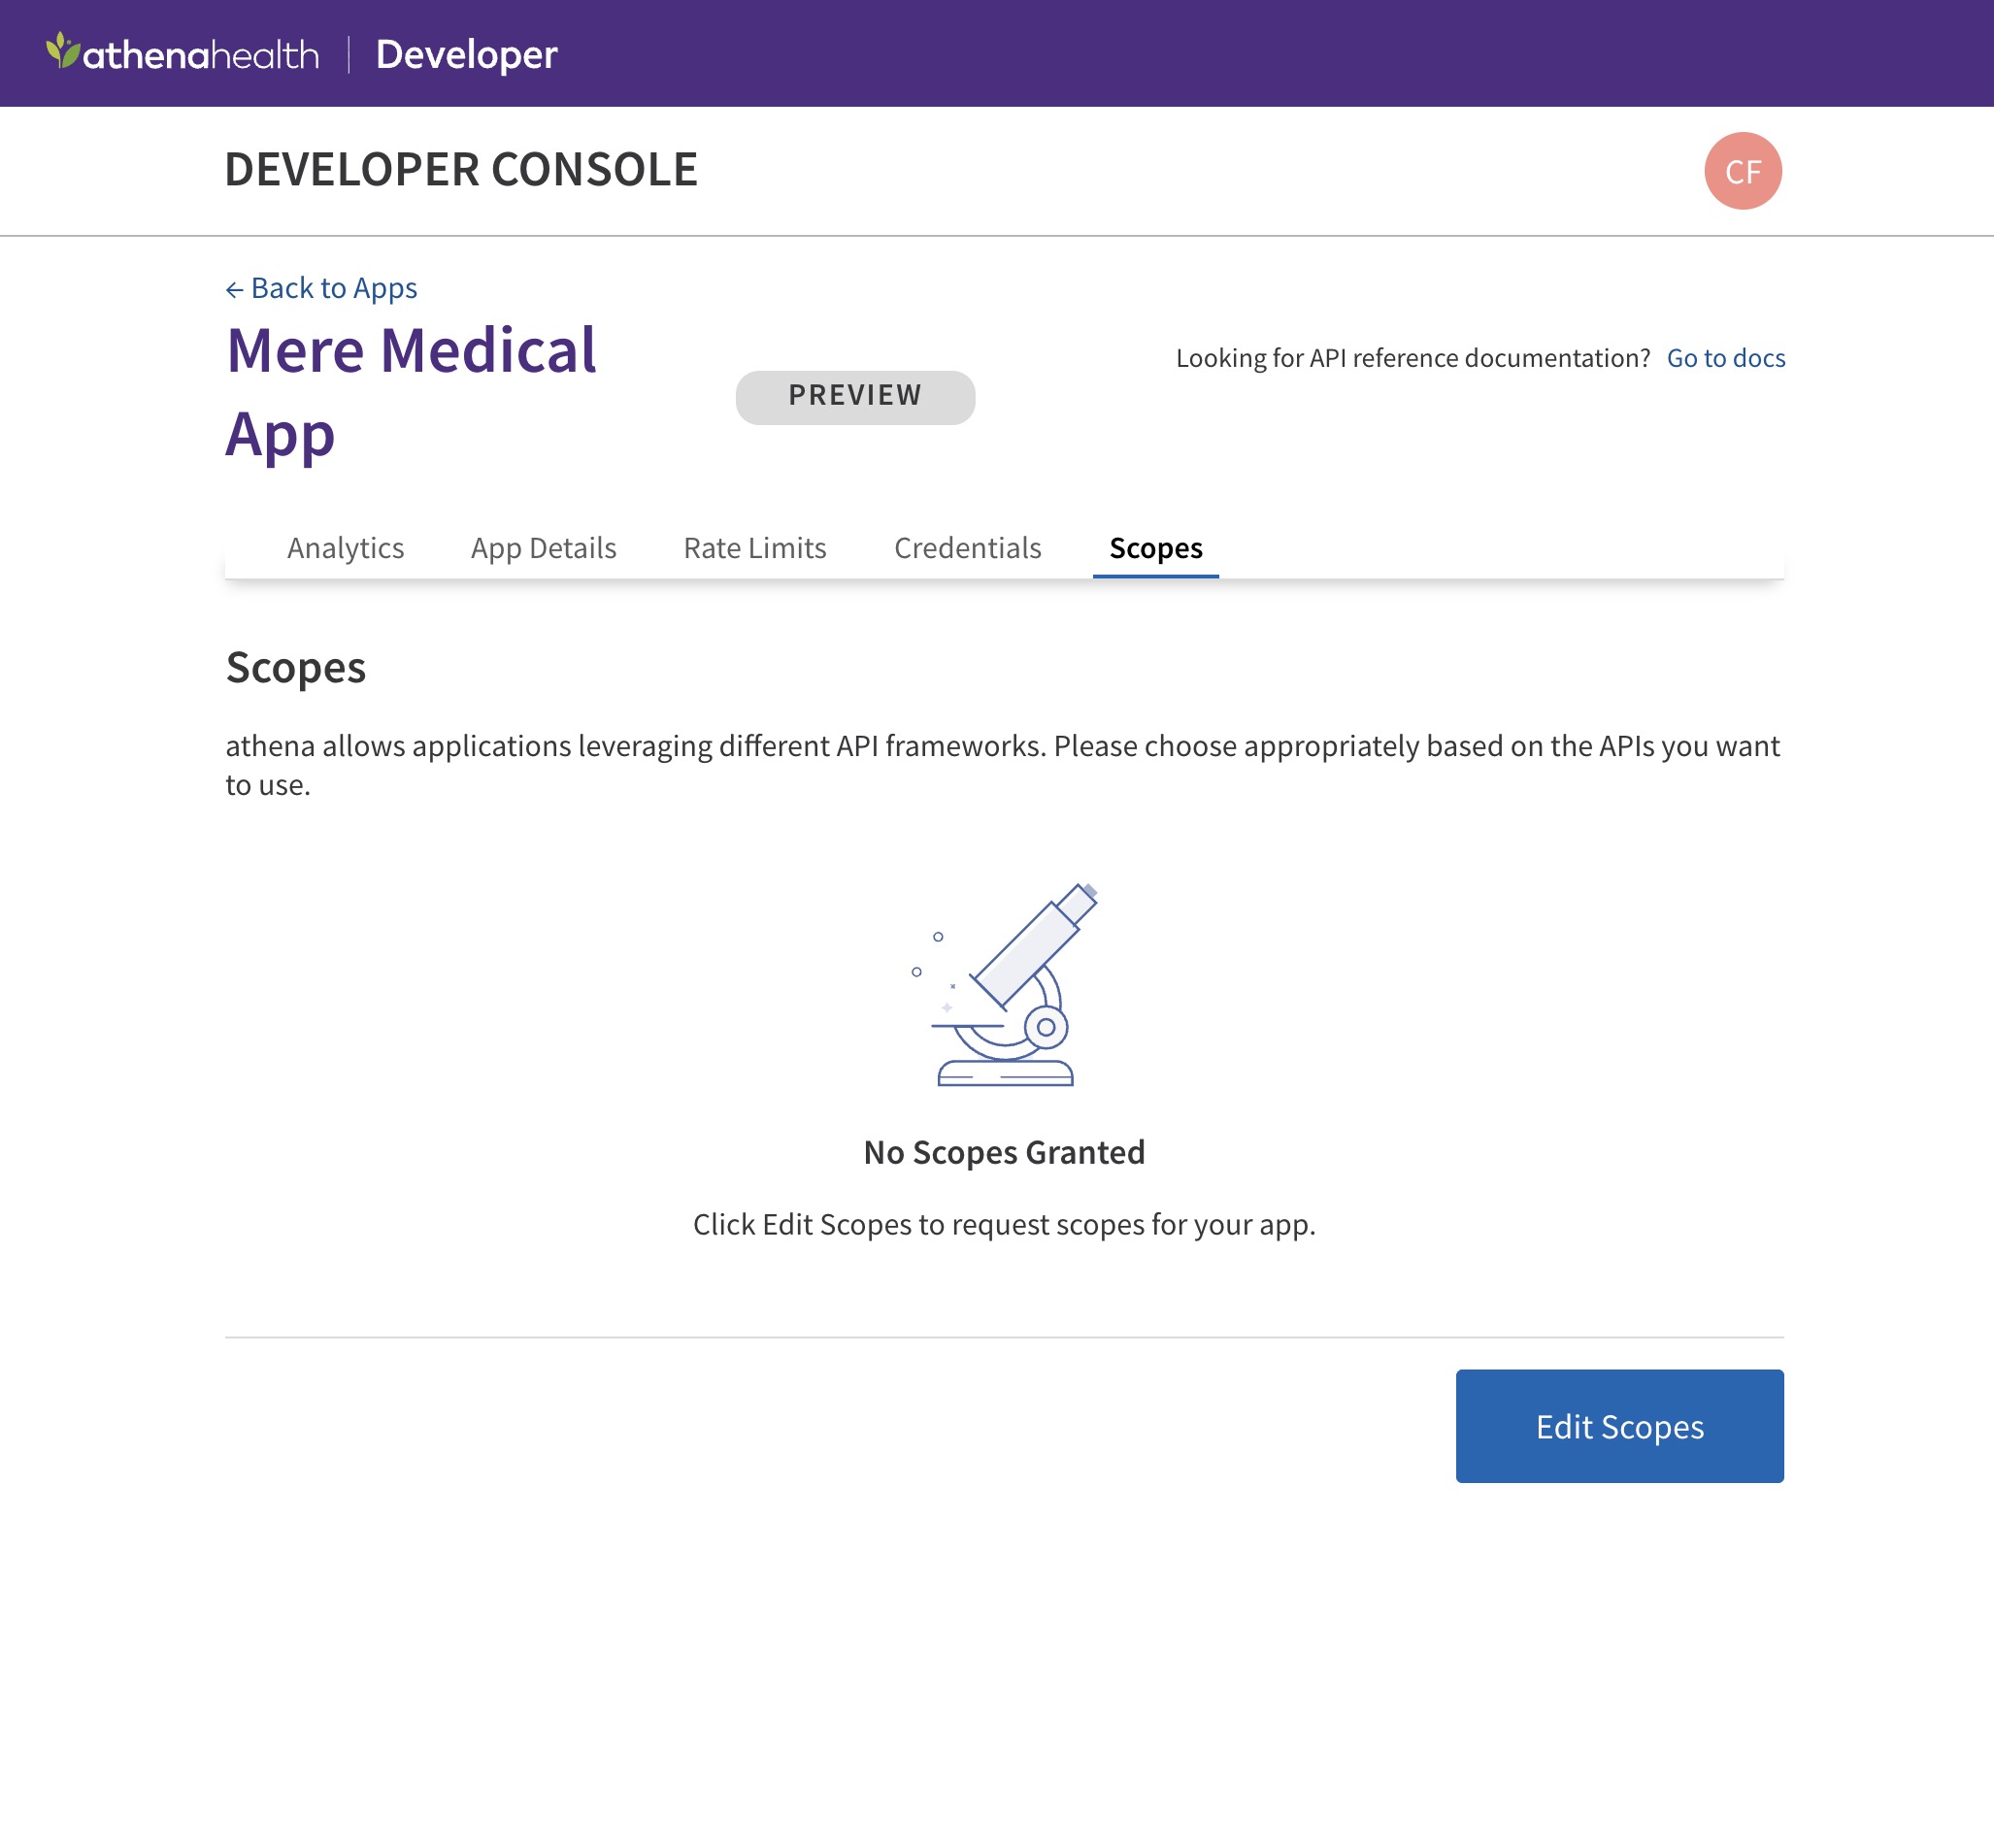
Configure Scopes
After creating your app, you need to configure the API scopes. Click on your newly created app, then navigate to the Scopes tab and click Edit Scopes.
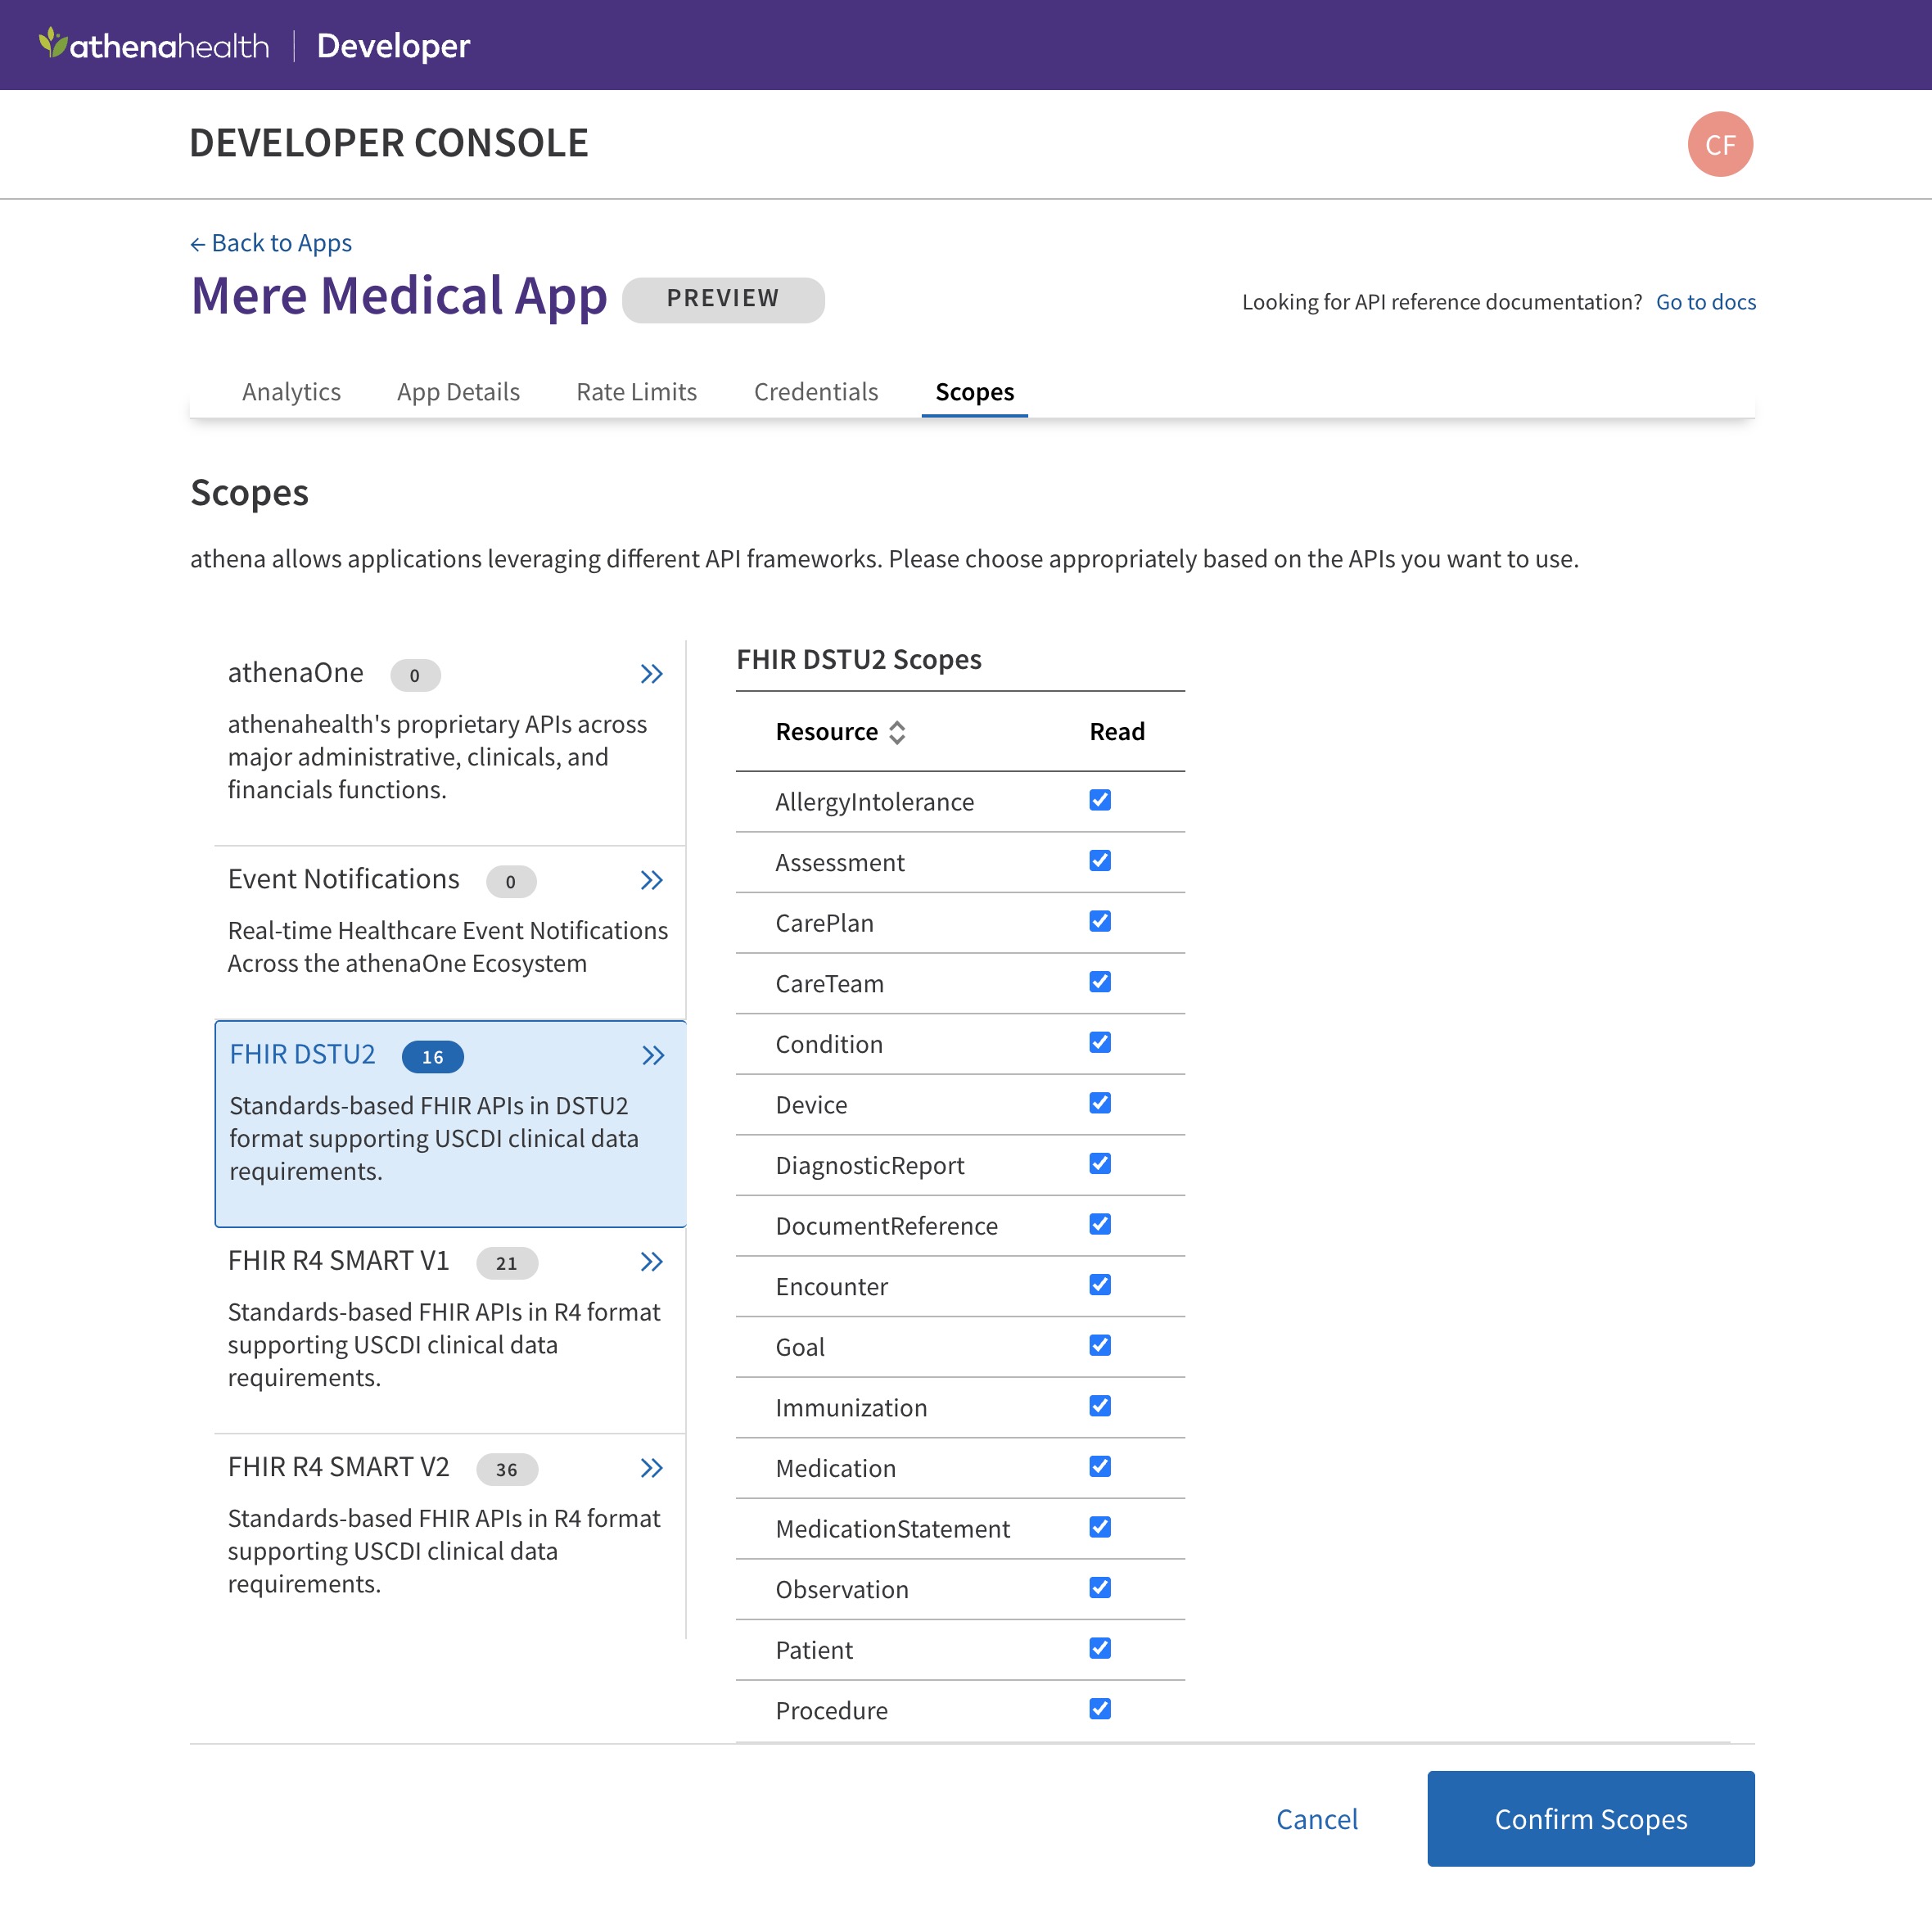
Select all available scopes from each of the following categories:
- FHIR DSTU2 (16 scopes) - Standards-based FHIR APIs in DSTU2 format
- FHIR R4 SMART V1 (21 scopes) - Standards-based FHIR APIs in R4 format
- FHIR R4 SMART V2 (36 scopes) - Standards-based FHIR APIs in R4 format
Click Confirm Scopes when done.
Mere Medical uses FHIR R4 SMART V1 scopes (.read format). The other scope categories are selected for completeness but are not currently used by the application.
FHIR R4 SMART V1 Scopes Used by Mere Medical
The following patient-context scopes with .read suffix are used:
| Scope | Description |
|---|---|
patient/AllergyIntolerance.read | Allergy and intolerance records |
patient/Binary.read | Binary data (attachments) |
patient/CarePlan.read | Care plans |
patient/CareTeam.read | Care team members |
patient/Condition.read | Conditions and diagnoses |
patient/Device.read | Implanted devices |
patient/DiagnosticReport.read | Diagnostic reports |
patient/DocumentReference.read | Clinical documents |
patient/Encounter.read | Encounters and visits |
patient/Goal.read | Patient goals |
patient/Immunization.read | Immunization records |
patient/Location.read | Locations |
patient/Medication.read | Medications |
patient/MedicationRequest.read | Medication prescriptions |
patient/Observation.read | Observations (vitals, labs, etc.) |
patient/Organization.read | Organizations |
patient/Patient.read | Patient demographics |
patient/Practitioner.read | Practitioners |
patient/Procedure.read | Procedures |
patient/Provenance.read | Provenance records |
patient/ServiceRequest.read | Service requests |
Get Your Client ID
After clicking Create Application, a popup will display your Client ID. Save this value for the next step.
Configuration
Add your Client ID to your Mere Medical instance:
# For production use (real patient data)
ATHENA_CLIENT_ID=your-client-id-here

# For testing with the Preview environment only
ATHENA_SANDBOX_CLIENT_ID=your-preview-client-id-here
If you only provide ATHENA_SANDBOX_CLIENT_ID, the app will only be able to connect to Athena's Preview environment for testing. For production use with real patient data, you'll need to go through Athena's app certification process and provide ATHENA_CLIENT_ID.